What IS Method Feeder Fishing??
(including video below)
In a nutshell, method feeder fishing uses an in-line, flat bottomed, palm-sized swim-feeder onto which ground bait and/or feed pellets are squeezed. Nothing startling so far, but the cunning bit is that the hook bait is trapped inside the ground bait/pellet mix and becomes exposed when the surrounding feed starts to expand/dissolve. It's an incredibly effective way to target fish feeding on the lake-bed...
Article By Gary Evans
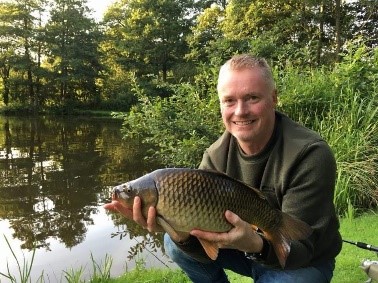
Gary Evans
Rediscovering Coarse Fishing
Although method feeder fishing was developed by match anglers fishing commercial carp lake through the 1990’s and early 2000’s, I didn’t try it until last year when I decided to return to course fishing after a break of 15 years...
Background to "The Method" revolution
In my early fishing days, which were mostly on the lower reaches of the Derwent and Derbyshire Trent, feeder fishing was often a last resort chuck-in of a heavy feeder and home-made attempts to construct rigs which prevented the hook length tangling with the main line and hoping for the best. Now I know different...
Winding the clock forward to the present day, I have found that the tackle manufacturers have engineered an amazing selection of tangle free, quick change, mistake-proof designs to save time setting up and improve bait presentation and hook-up rates consistently. If you are interested in learning more about the development of the method feeder try this video: The History Of The Flatbed Method Feeder With Andy Findlay (credited as the inventor of "the method").
Further, I have been impressed with the amount of free information available on-line produced by tackle manufactures explaining this technique. It was from viewing various video tutorials that I became familiar with the method. For instance:
The embedded video above is an example of what's available on YouTube. (BTW, there are no affiliate links or sponsorship arrangements in this article). BUT, as you'll soon see when searching YouTube, the sheer variety and volume of information available can be completely overwhelming. As you're trying to learn, it can be impossible to separate the good advice from the sales pitches (which, of course, often contain lots of useful information too). This article concentrates on the simple steps that I've found to work easily for me.
How did Method Feeder Fishing Get its Name?
If you are wondering why it’s called “method feeder fishing”, my understanding is that as this design of feeder began to convincingly win matches in the 1990’s (against the then best match techniques) and was therefore simply referred to by anglers as “The method” (to use) -but what makes it so good?
Fish are attracted and retained in the very small, concentrated, area of bait (the size of your palm).
This means any fish sucking up the free feed on the feeder inevitably suck up your hook bait too.
The hook length is fixed to the feeder, and this is deliberately short (4”-6”) so that the weight of the feeder sets the hook, via the "bolt-rig" effect at the slightest movement of the fish.
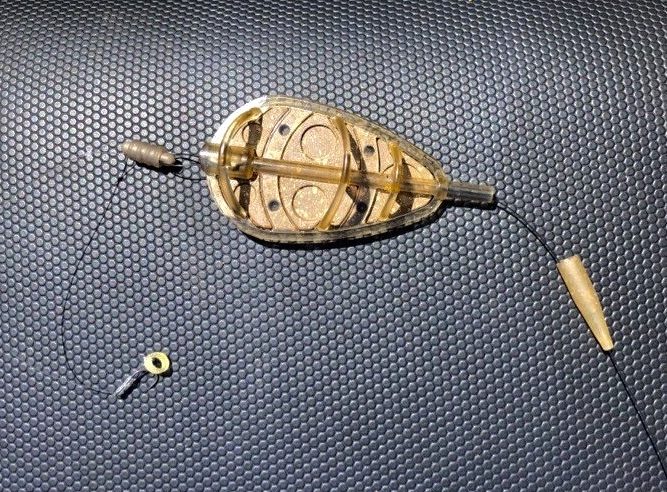
Example of a modern "Method" Feeder (minus feed)

Example of a modern "Method" Feeder (packed with feed & ready to cast)
Waste-not, Want-not
As with all match angling, efficiency is a key aspect – a bit like lean-manufacturing principles and “waste elimination” in the work-place. The method feeder is sized to carry just enough bait to get a fish on the hook, there’s no point over feeding the fish or wasting feed. More importantly, you need to consider that the free feed is competing with your hook bait in terms of attention from the fish, too much bait would waste precious time when fishing in a match.
Consequently, when the fish are feeding confidently, bites can be expected within a minute of the feeder landing on the bottom and the feeder is usually recast within 10 minutes to supply a fresh mini-feast of bait if there was no bite. Frequent casting with pin-point accuracy to hit the “hot spot” you have created is necessary (more on this later).
A rod with a quiver tip is generally used to detect bites, but a sensitive tip for delicate bite indication is not an absolute requirement as the fish bolts when it feels the weight of the feeder on the hook.
Method Feeder Fishing Rig (Free-Running, Fish-Safe Version)
Part of the reason the method feeder works is it uses a type of "bolt-rig". This is where the fish pulls against your casting weight after it takes the bait in its mouth and hooks itself as it bolts after feeling the hook-point - thus driving that hook-point home. Naturally, super-sharp hooks are essential to success here.
Inexperienced anglers can often accidentally set up versions of a bolt-rig that are dangerous to the fish you want to catch. The problem comes when a fish is strong enough to break your main fishing line - and the heavy weight remains tethered to the fish...
Modern method feeder fishing rigs avoid this problem with some clever design features. The diagram below shows you how (follow the steps from Left to Right). Start by threading your main line down through the central tube of the feeder (arrows) and tie on your quick-change bead.
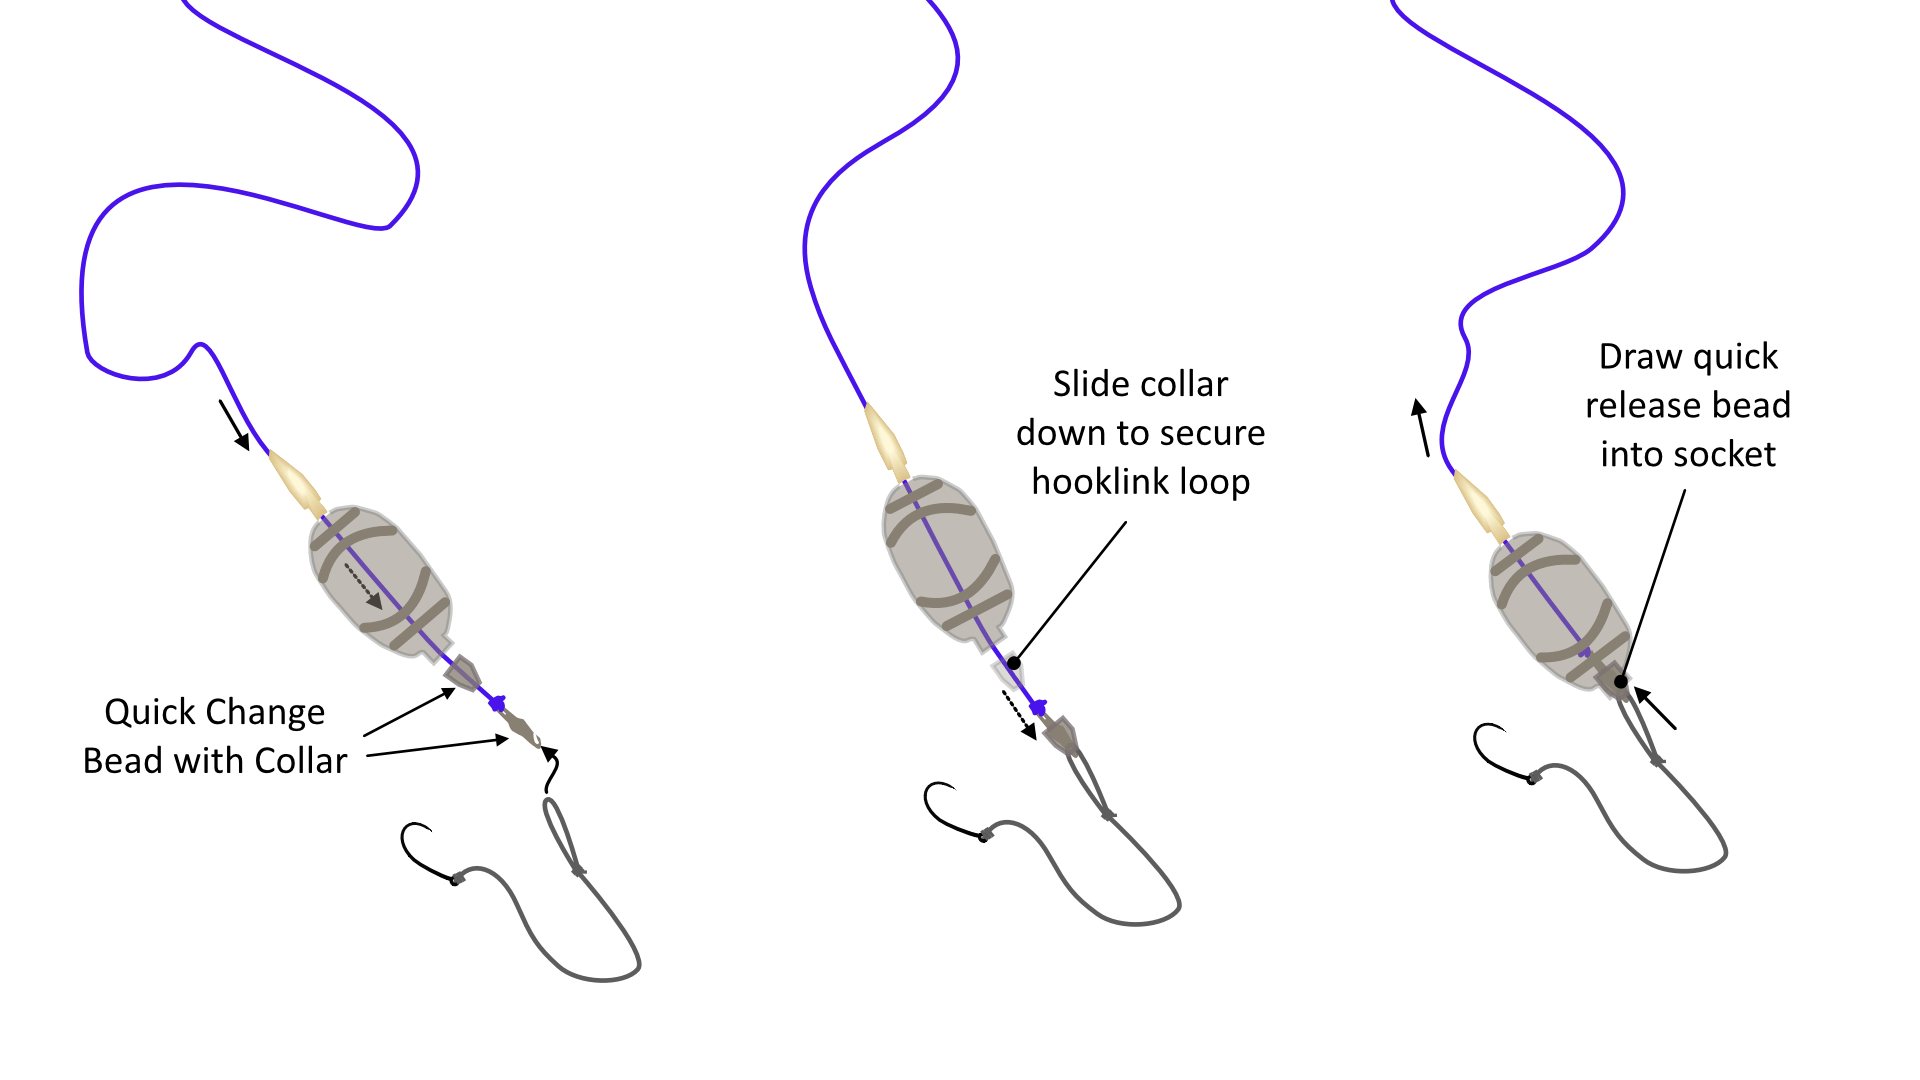
As you've seen, the feeder is a moulded metallic or plastic structure with hoops to retain the ground bait/feed pellets mix, a central tube through which you pass the main line and a flat weighted section on the underside. Some brands have a removable tube to facilitate quick change of feeders without disconnecting from the main line. Here are the key points on how it works:
Arm yourself with More Rigs
Before moving on to the different types of method feeder designs you might want to arm yourself with some more "secret weapon" rigs for all of your coarse fishing with my Free e-book.
Just Click Here or on the Book Image/Button below to register for your Free Copy - plus 5 more fishing secrets via email:
Method Feeder Options
Method feeders come in a variety of sizes, shapes and weights. I found this video by Nick Speed that (I think) provides very logical advice which is summarised beneath the video:
Weight selection factors (Range 15g-45g)
Casting distance, Gradient of lake-bed, density of lake bed, depth of water
Casting distance is an obvious factor, but a sloping shelf close to a bank needs a heavier feeder to prevent it sliding off position. A silty bed may require a lighter feeder to prevent it sinking. Very deep water may need a heavier feeder to avoiding losing the bait mid-water during descent.
Size Selection Factors for Method Feeder Fishing
Fish Hunger and Temperature
The amount of feed bait required to be delivered will vary with temperature – which controls fish metabolic rate. In winter, lower temperatures limit the amount of food fish can process (so smaller feeders with less feed is best). In summer, the rise in water temperature creates a larger demand for food in fish (use larger feeders that deliver more feed).
Shape selection factors for Method Feeder Fishing
Water depth, Voracity of fish feeding
Feeders with edge “walls” help prevent feed falling off mid-water during descent in deep water and contain the feed within an even smaller area for when bites are infrequent and fish are not feeding confidently.
Main-line Options for Different Weights of Feeder
Depending on the feeder weight, size of fish (and casting distance) involved, reel lines will usually vary between 6lb and 8lb mono. This covers a range of applications from light mixed coarse fishery species to medium sized fish in commercial carp fisheries. Throwing super-heavy feeders long distances for bigger carp might make 12lb - 15lb main lines more sensible. For those situations - some protection for your fingers while casting might be in order! Whether that is simple elastoplast - or a dedicated "casting glove finger stall" product.
Rod characteristics for Method Feeder Fishing
A rod with a softer action is preferable to minimise fatigue of the main line which could be caused by the frequent casting and by the feeder bouncing only inches from the fighting fish.
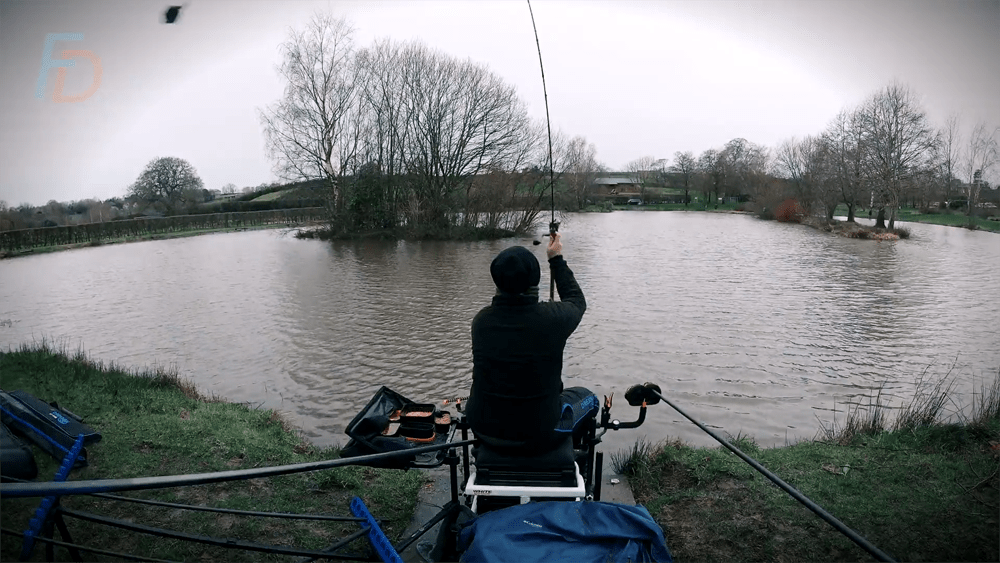
Shaun Gaskell on his way to a section win casting his method feeder
Additionally, the hook doesn’t need to be set home with a firm strike since fish are self-hooked by the weight of the feeder.
Rod length depends on the casting distance required but rods are typically 10’-12’ long. A hi-vis quiver tip is used for bite detection and this needs to match the weight of the feeder being used.
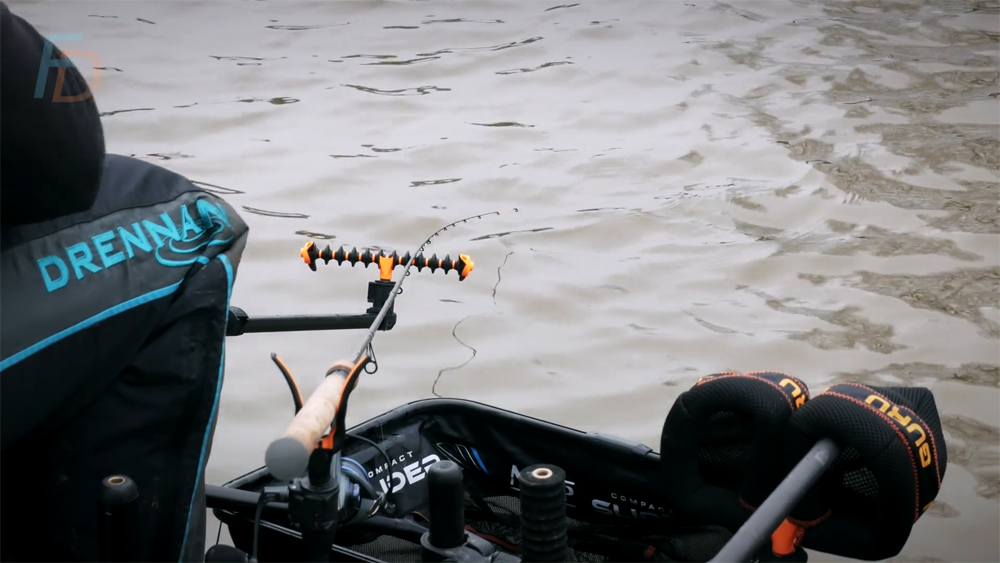
If large carp are likely to be caught then use of a carp rod makes sense (with a 3lb test-curve being a go-to "all-rounder" rod these days). The tip will still provide sufficient bite indication of a large carp bolting. It is very important to ensure the rod is firmly secured in rod rests as a bolting fish can easily take the rod into the water.
Suggested Reel size
A fixed spool reel of 3000 size and upwards is recommended. A larger spool size may be required for long distance fishing where thicker and stronger lines, up to 12lb, would be used. Spools should have line clips which are used to assist accurate casting to a fixed distance, for example, to the far bank or to an island.
If you intend to fish more than one rod at a time, then a reel with baitrunner or quick release drag should be used to avoid a bolting fish pulling an unwatched rod into the water. An audible bite indicator would make sense if you are fishing multiple rods.
Fishing the Method
Before fishing it is important to prepare the bait, this is covered later. Initial feeding of the swim is sometimes achieved with a large cage feeder and no hook link, repeated casts are made and the feed is deposited in the swim by a firm strike (hook-set). The set-up is then changed for the method feeder with hook link. Alternatively, very frequent casts with the method feeder can be made to feed the swim. If within range, feed bait can obviously be catapulted to kick-start the swim.
Casting Skills for Method Feeder Fishing
Once fish are in your swim, and to maximise your catch, consistently casting to the same place is very important.
The aim is to find a mark on the far bank to cast to and use the line clip on the spool to stop the cast at the correct distance.
Setting that distance is often done with a bomb by repeated casts, gradually paying out more line between casts until the correct range is achieved.
Then you can put your line into the clip at exactly the right point.
When casting into shallow water, try to cushion the water impact by slowing the feeder just before impact. This will prevent spooking fish but it does take practice to achieve. Skills you'll need to practice:
Once your feeder hits the water, close the bail arm and place the rod tip under the water and hold it down until the main line is also under water, a slight turn of the reel may be needed. The aim is to have a straight line from rod tip to the feeder.
Securely place the rod on rests angled down to the water surface and wait for a bite – this will be obvious as the fish will bolt when they feel the feeder. Just lift he rod into the fish – no need for a firm strike to set the hook.
Loading up with bait
Refilling the feeder and replacing the hook bait can be a little fiddly, but it helps if you can organise everything you need to make it a slick process – in match fishing this is “lost” time, a bit like a pit-stop in F1 racing.
The hookbait can be placed in the middle of the feed bait or on top of it. Having it in the middle can prevent unwanted bites from smaller fish while the feed bait is dispersing. Method feeders come with moulds, see pics below, which have a dimple to correctly locate the hook bait. The moulds provide the optimum shape and volume and compress the feed bait onto the method feeder.

Hook-bait (attached to a hair with a band) added under the "top" layer of feed. What ends up on top in the feeder is the bottom layer in the mould.

Base-layer of pellets added to the mould - similar to, but slightly smaller than, the hook-bait in this case.

Ready to launch! Notice the looped hook-link and the quick-release bead pulled up snugly into its socket.
The hookbait can be placed at the top of the feed or inside it. The hookbait goes into the mould first if it is required to be at the top, or place some feed to cover the mould surface and then add the hookbait and further feed if it is required to be buried inside. Always make sure the hook length enters the bait mix at the same end as it exits the feeder.
Applying the right pressure on the mould to compact the feed bait is important for it to stay on during the cast.
If in doubt, a gentle squeeze in the palm of your hand after removing from the mould can consolidate it.
However, this will only be achieved if the bait has been properly prepared to give enough “stickiness” and consistency.
Feed Mix Options for Method Feeder Fishing
I mentioned earlier that a vital factor to maximise your catch when method feeder is to be able to consistently cast to the same area. An equally vital factor is preparation of the feed bait.
If you watch any of the free videos about method feeder fishing, you will note that about half of the content is dedicated to this aspect, that said, of course the tackle companies are also plugging their usually pricey variant of bait and other flavouring additives. On the Nick Speed video embedded above (Method Feeder Fishing Tips with Nick Speed) at 15min 50s you can see the intent of the method feeder’s bait presentation and why this is an obvious benefit of the method.
There are also extensive details about bait consistency from the ultra-laid-back inventor of the method, Andy Findlay, here:
Don't Worry - Have Confidence!
Bear in mind that the videos are delivered by match-winning anglers aimed at optimising catch rates to win fishing matches. So, whilst there are lots of good tips and advice, as a pleasure angler don’t get stressed about trying to adopt everything – as you will still catch if you get the basics right. It is all too easy to get overwhelmed by the massive amounts of detail and lose confidence - when just doing a few of the simple basics right will be more than good enough!
To demonstrate this, below is a pic of my first attempt at method feeder fishing, my main objective was to make sure my hookbait stood out from the feedbait (some free videos actually advise the exact opposite), below it is the nice carp which took this very bait. I might not have won a match that day, but the method worked, I had some very nice fish and a great afternoon’s fishing.
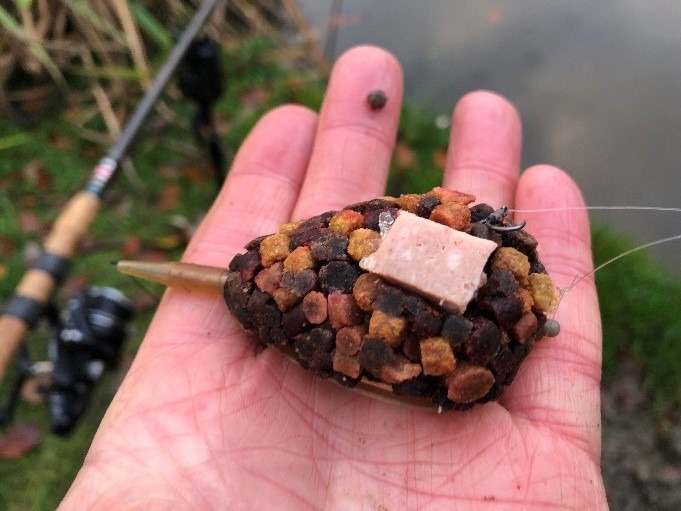
My very first attempt to fish a "method" style feeder - "good enough" is good enough!
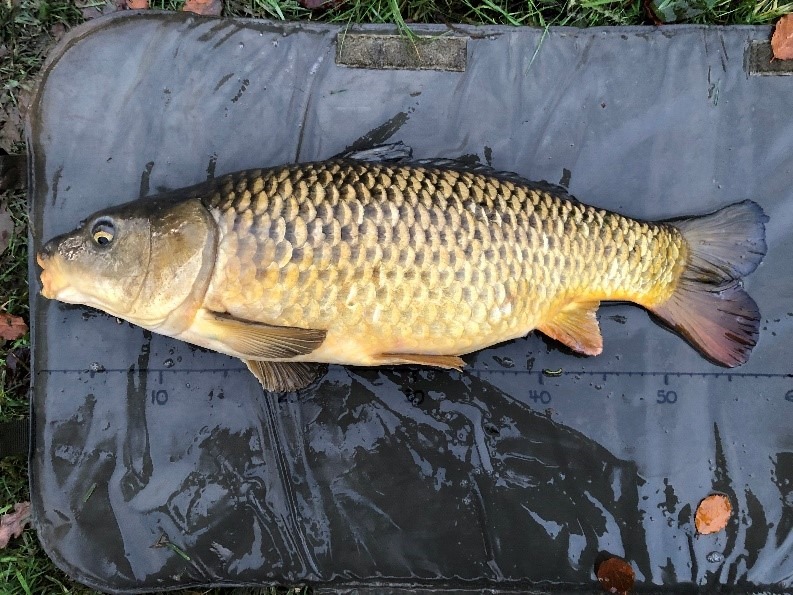
If I'd let perfectionism put me off trying that rig - I'd have missed out on a session catching these!
For that session, I was using the only pellets I had at the time which, although are quite large at 4mm and 6 mm, still moulded to the feeder and survived the cast. I added to the pellet mix some luncheon meat flavoured syrup (one of many bait flavourings available) which helped to bind it together. I now have 2mm pellets which form a smoother profile and groundbait which I blend with the pellets as an extra attractant and binder.
You can find a wide range of baits featured in the YouTube videos created by bait and tackle companies - so there's no shortage of extra inspiration if you like to experiment.
Whichever feed bait you choose (groundbait, pellets, or a blend of both) make sure you follow the manufacturers soaking, straining and sieving recommendations.
In some cases this is best done the evening before fishing.
Important Note: These baits will dry out during the fishing session so they need to be moistened from time to time or sealed in a tub – some anglers use a hand water sprayer to keep the bait moist.
Overall, the aim is the make the bait stick to the feeder to survive the cast and impact with the water’s surface. If you retrieve your feeder and it still contains most of the feed, then the mix is too sticky.
The general advice I have picked up from the match angler free videos is that groundbait is more effective in summer when there is more food available to them and you need to attract fish to you swim. It is mixed in with pellets but forms the majority ingredient.
It makes sense to have separate tubs of prepared ground bait and pellets at hand to be able to change the ratio during the session depending on the need to attract (groundbait) or retain (pellets) fish in the swim.
In winter, the general advice it to have pellets as the majority ingredient. Maybe 50/50 is the best of both and I think most anglers would take confidence in this approach.
Method Feeder Fishing: Hook-baits for Different Species
Method Feeder Fishing for Carp
There are many options for catching carp when method feeder fishing, sweetcorn, boilies, pellets, wafters (neutral buoyancy boilie/pellet) maggots (dead so they don’t wriggle out of sight), worm, prawn, luncheon meat and more...
Method Feeder Fishing for Bream
Bait options include casters, dead maggots, chopped worm, pellets, corn (3 grains), luncheon meat and use of hair rigs for the large particle baits.
...Otherwise it is the same method using the same tackle.
Method Feeder Fishing for Tench
Caster, dead maggots, worm, prawn, corn, pellet, luncheon meat - you could even add liquidated molasses to the feed mix!
Again, now that we've covered the fundamentals in the rest of the article - it's easy to see how to apply it to tench by matching it to some of your favourite hook-baits.
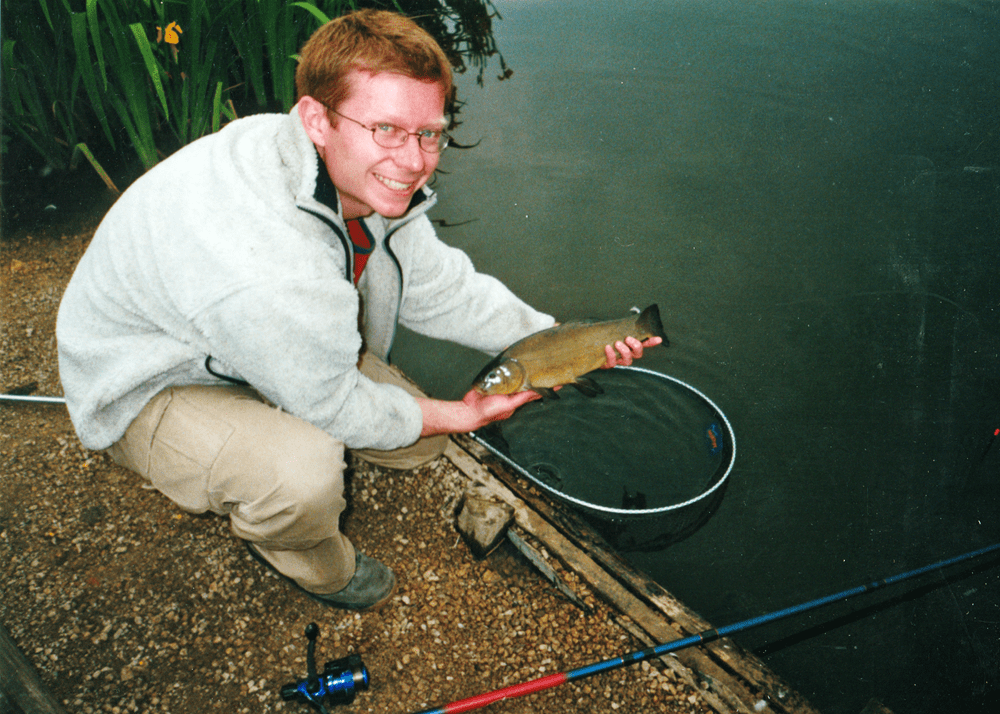
Tench on Holiday-Park Hired Tackle: Fuzzy, vintage photo album snapshot of FD's Paul Gaskell (who doesn't love a tench?)
Final Roundup Tips for Successful Method Feeder Fishing
To finish off, here's some highlighted points to keep in mind that will help you create the best chances of success for yourself:
Special Accuracy & Big Fish Tip
Last of all - don't forget to use a simple marker knot made with a separate piece of line on your main-line for EXTRA ACCURACY. If you have strong fish that will take line from the reel, this will be invaluable. Having a knot marking the exact spot on your main line to clip up to lets you quickly place that line back in the clip after landing your fish.
To make a marker knot, just take a piece of line and hold it against your main line at the spot you want to mark. Then begin to tie a simple overhand knot where the tag end also wraps around the main line (as well as the other tag-end of the separate mono). Continue to make 4 or 5 turns with the tag end, moisten and draw tight - before trimming both tags. The knot will grip firmly enough to mark a position, but should also let you slide it up or down the line to a new position as required.
With that last tip, I hope you are armed with everything you need to go out and try "The Method" for yourself.
Tight lines!
Gary Evans
