Ok, so you’ve got your new pride and joy out of the box… if only you knew how to set up a baitcaster reel and avoid the frustrating pitfalls that get in the way of enjoyable fishing!
In this guide, I’ll try to give as much of the “why” as only the “how”. That way you can judge whether the advice here is better for you than the many different opinions you’ll find out there.
If you just want to know what “settings” to use on your reel to avoid back-lashes (and still cast a good distance), jump straight to Part 3…
Part 1 of How to Set up a Baitcaster Reel: Threading & Attaching Your Line
No matter whether you have an ultralight or a more heavy-duty baitcasting reel, many basic rules apply. The first being that you mustn’t forget to thread your line through the baitcaster's line guide AND, through the first guide on the rod-butt you’re using to help you.
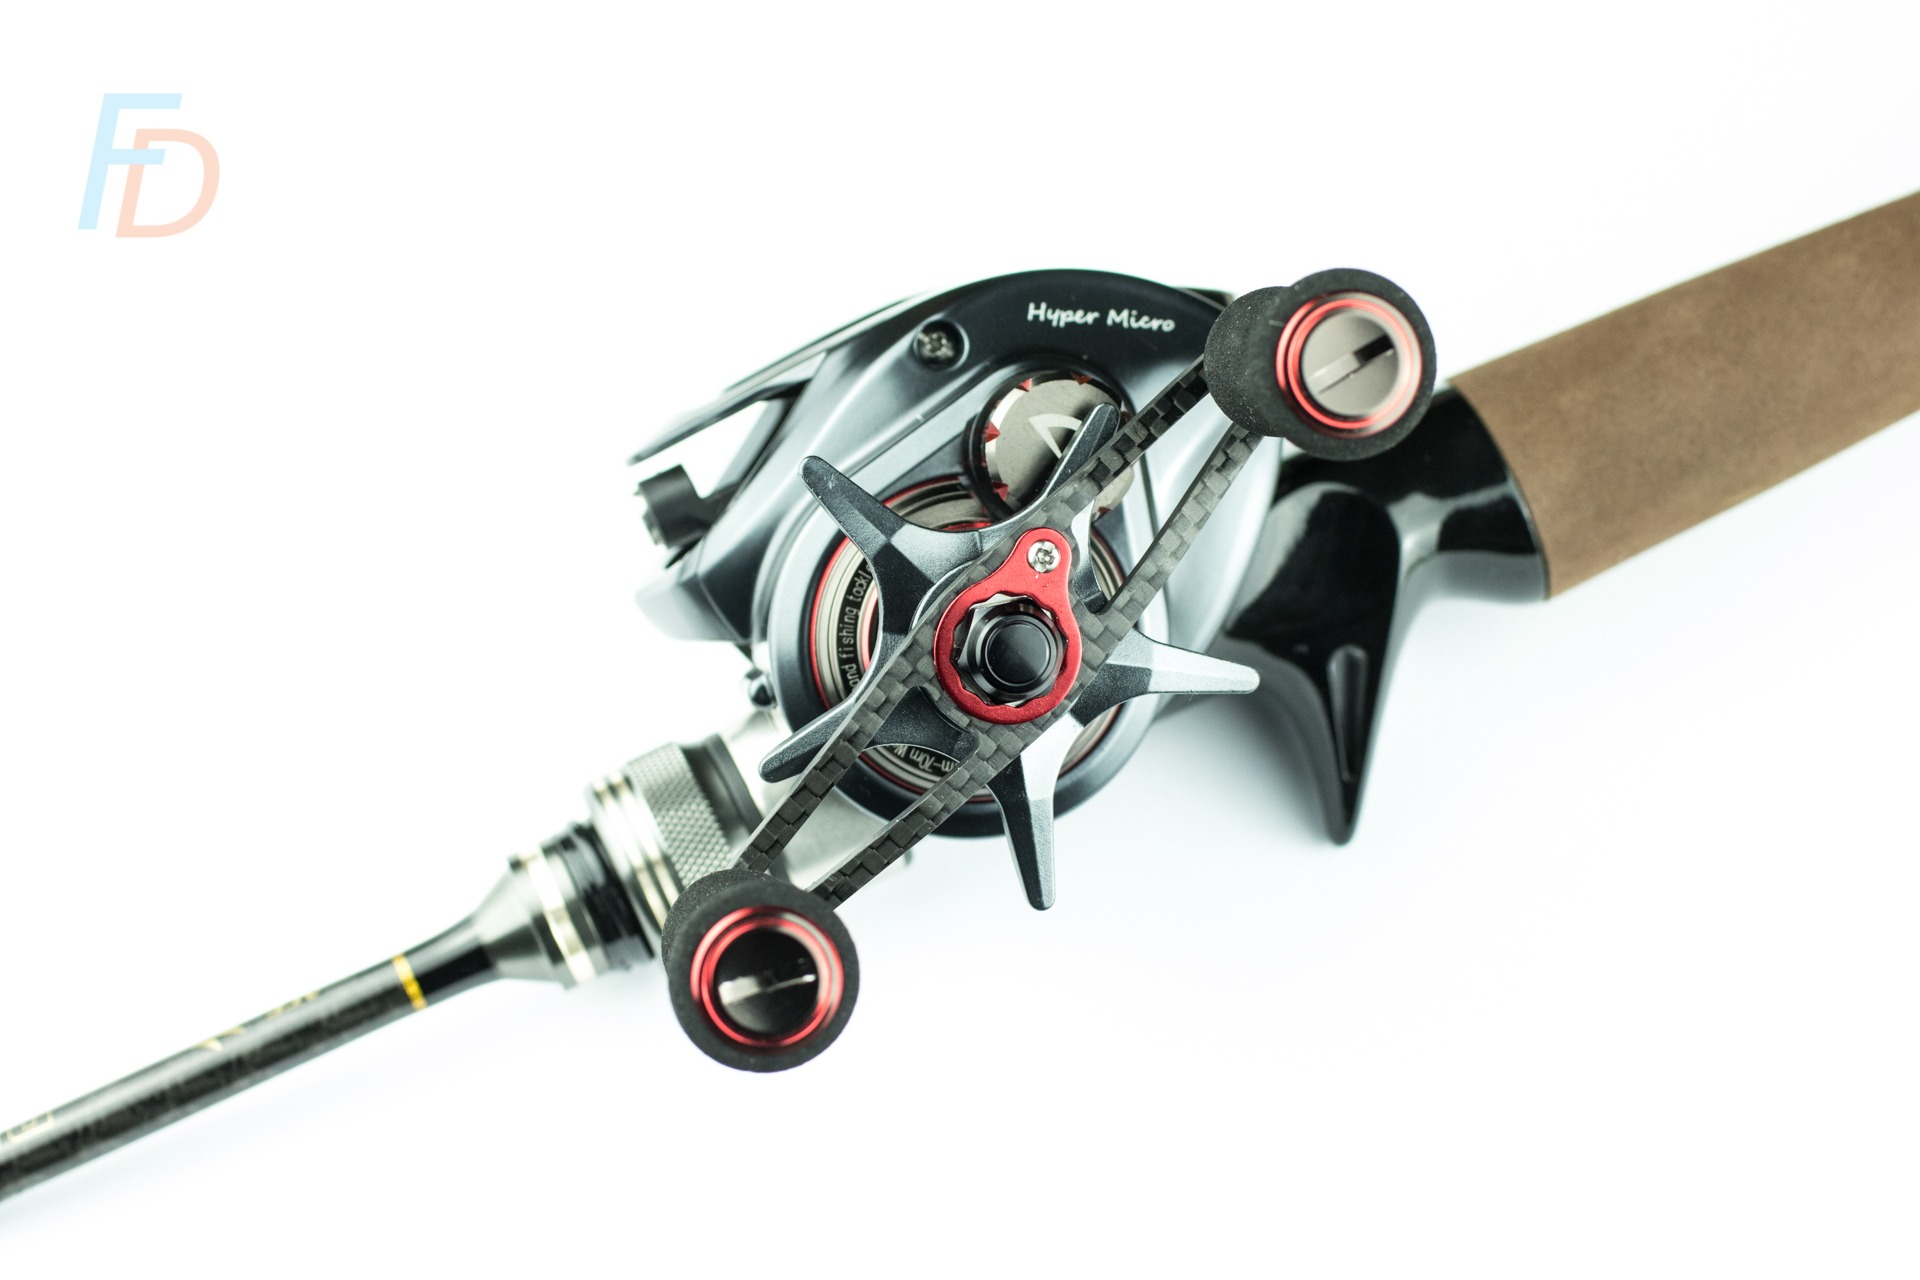
Wait, Hold on - where does this rod butt come in?
Well, the easiest way to keep everything manageable is to have your reel attached to the butt section of a baitcasting rod (as pictured above) while you spool everything up. For that reason, it can be a bit easier to avoid using a one-piece rod.
This is because you only need to thread it through the line-guide nearest the handle. That means it's handy to not have the entire length of the rod swinging around, banging into things.
Now take your spool of line and push a pen (or anything similar) through the centre hole in the spool before peeling off a yard or so of line.
Pro-tip: For ultralight baitcasters, I like to clip a cheap line counter (e.g. below) to my rod butt so I can add exactly the length of line that I want (and avoid adding too much weight to the ultralight spool).
This step isn’t necessary though – particularly when you’re just going to aim to almost fill your reel spool with line.
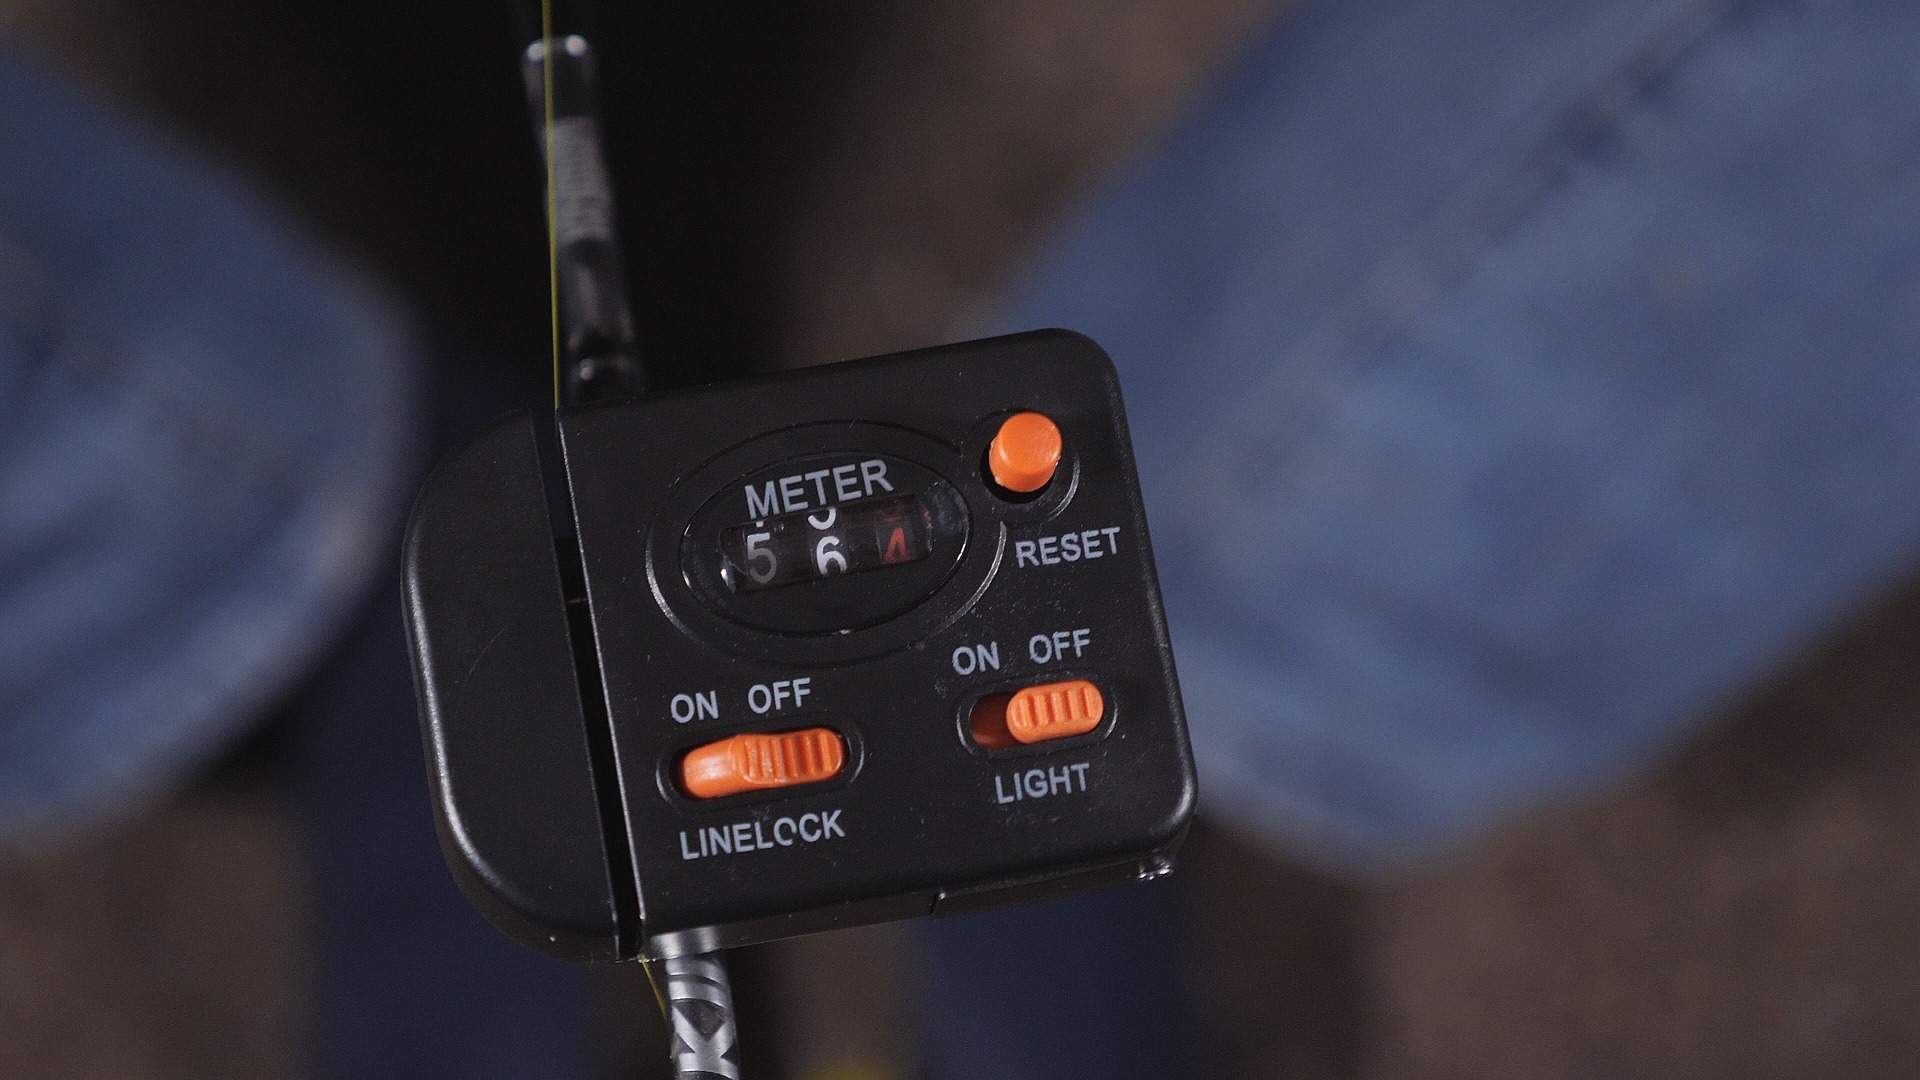
Line Counter attached to rod butt
Now thread the line through the butt line guide (or your line-counter, if using) and then thread it through the line guide on the front of your baitcaster reel.
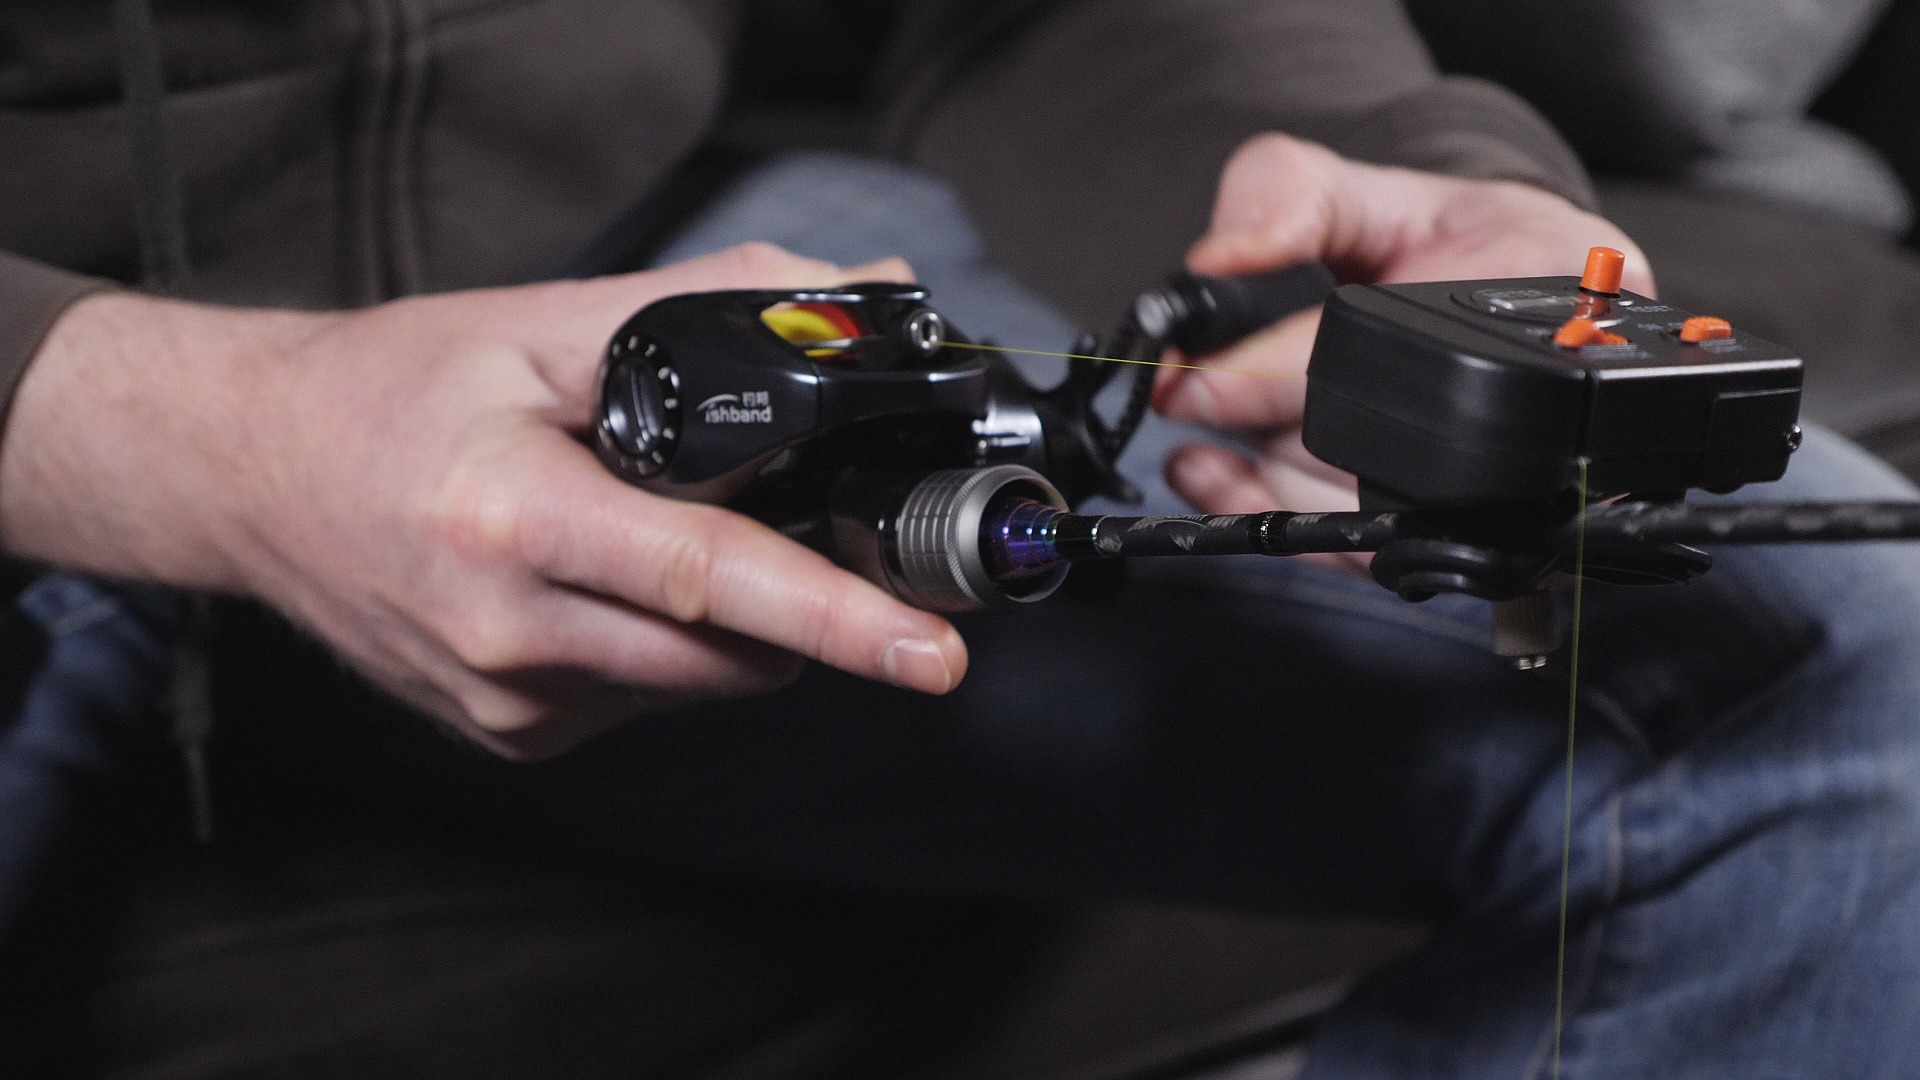
Here I've threaded the line through a line counter rather than the first line-guide on the rod
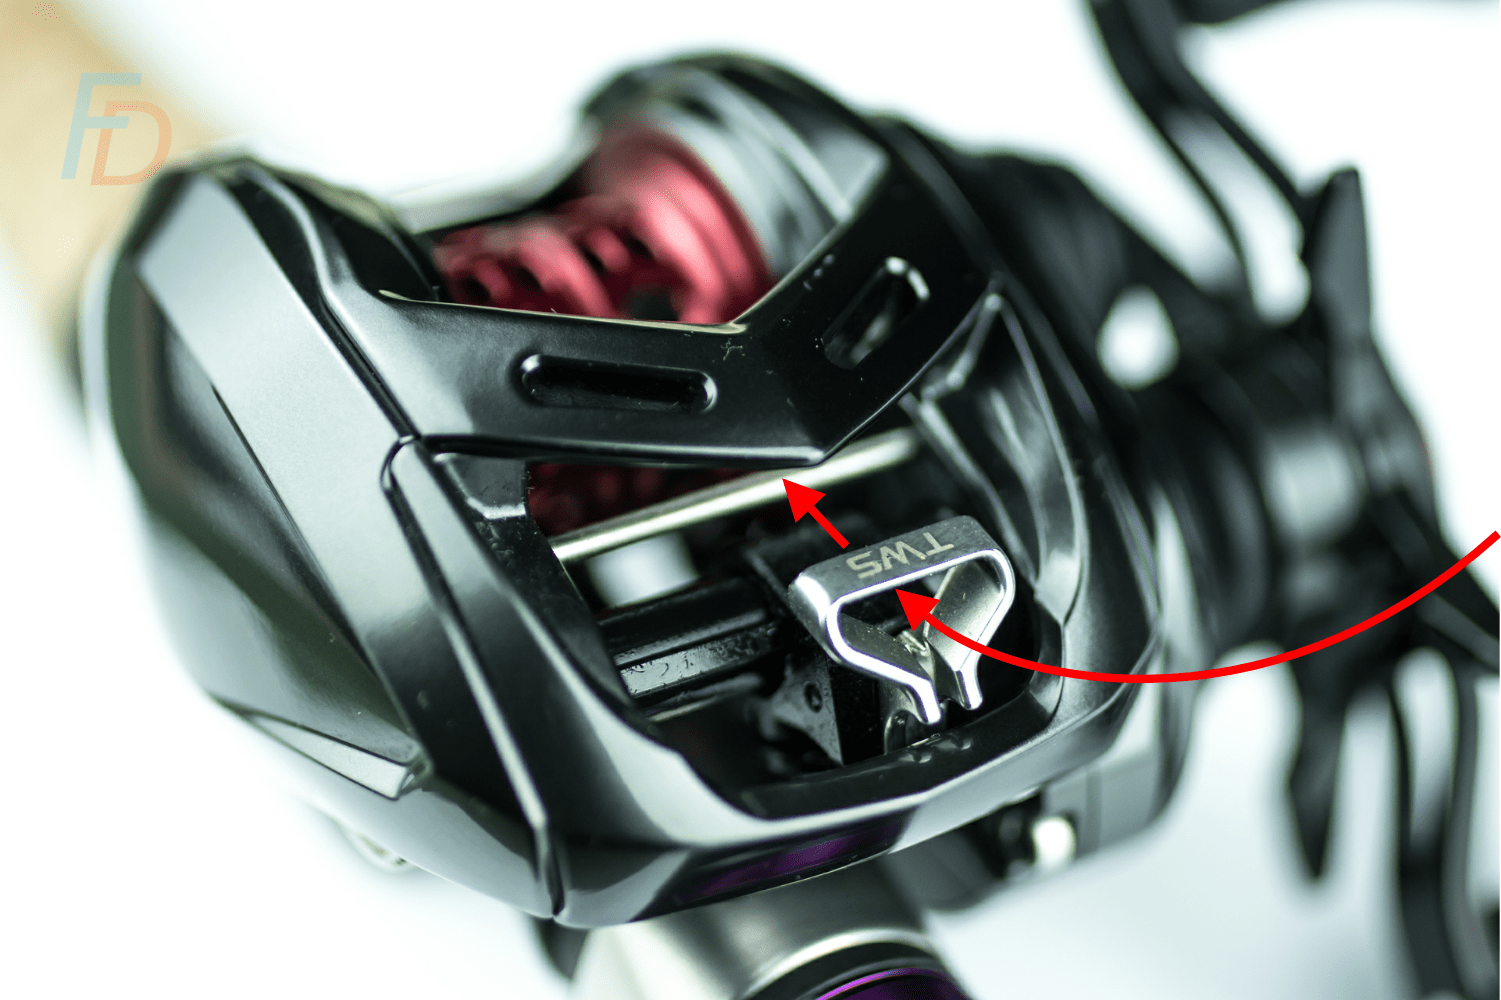
Direction for threading line when spooling up
Make sure to thread from the front edge of the line guide (facing the rod) to the back edge (facing the reel-spool). Pull some excess line through so that it doesn’t slip back out after you’ve threaded it.
With a smaller reel where it is difficult to get your fingers inside to mess with the spool, you can pop the side plate off and slide the spool out. This makes it much easier to attach your line to the spool.
Note: Of course, when it comes to fishing and pulling the line off your spool to string up your rod, you'll need to thread the line in the opposite direction through the reel's line guide.
Don't just set up your reel like a pro...
Use it like one too!
As well as all the tips to attaching your line and setting up your baitcaster so it protects you against backlashes in this article (below); you can get ahead of the crowd by checking out my free guide to lure fishing secrets.
Just Click Here or on the Book Image/Button below to register for your Free Copy - plus 5 more fishing secrets via email:

How to set up a baitcaster reel: Best Ways of Attaching the Line
You face a couple of main options for attaching your line - Just a single, sliding, loop (created by an arbor knot or even a Uni knot variation) – OR – for braided line on shallow spools; a multiple-wrap sliding knot. Note, that this second option is only practical when you can easily take the spool out of the reel.
Whichever option you choose, here’s the arbor knot which is a good all-round choice you to use to make the sliding part of your loop. It has very few turns and, so, keeps a pretty low profile:
Alternatively, the modification that Jimmy from raWr fishing uses to make a round-loop uni knot is also a good option (see video below).
The issue with braid is that it loves to slip around the spool. Adding several wraps into that sliding loop solves that problem – WITHOUT the need to add electrical tape or monofilament backing. Whether you use a uni knot or an arbor knot, you can add those extra turns as long as your spool is easy to remove and re-install...
Here’s how to do that:
Part 2: Winding line onto the spool
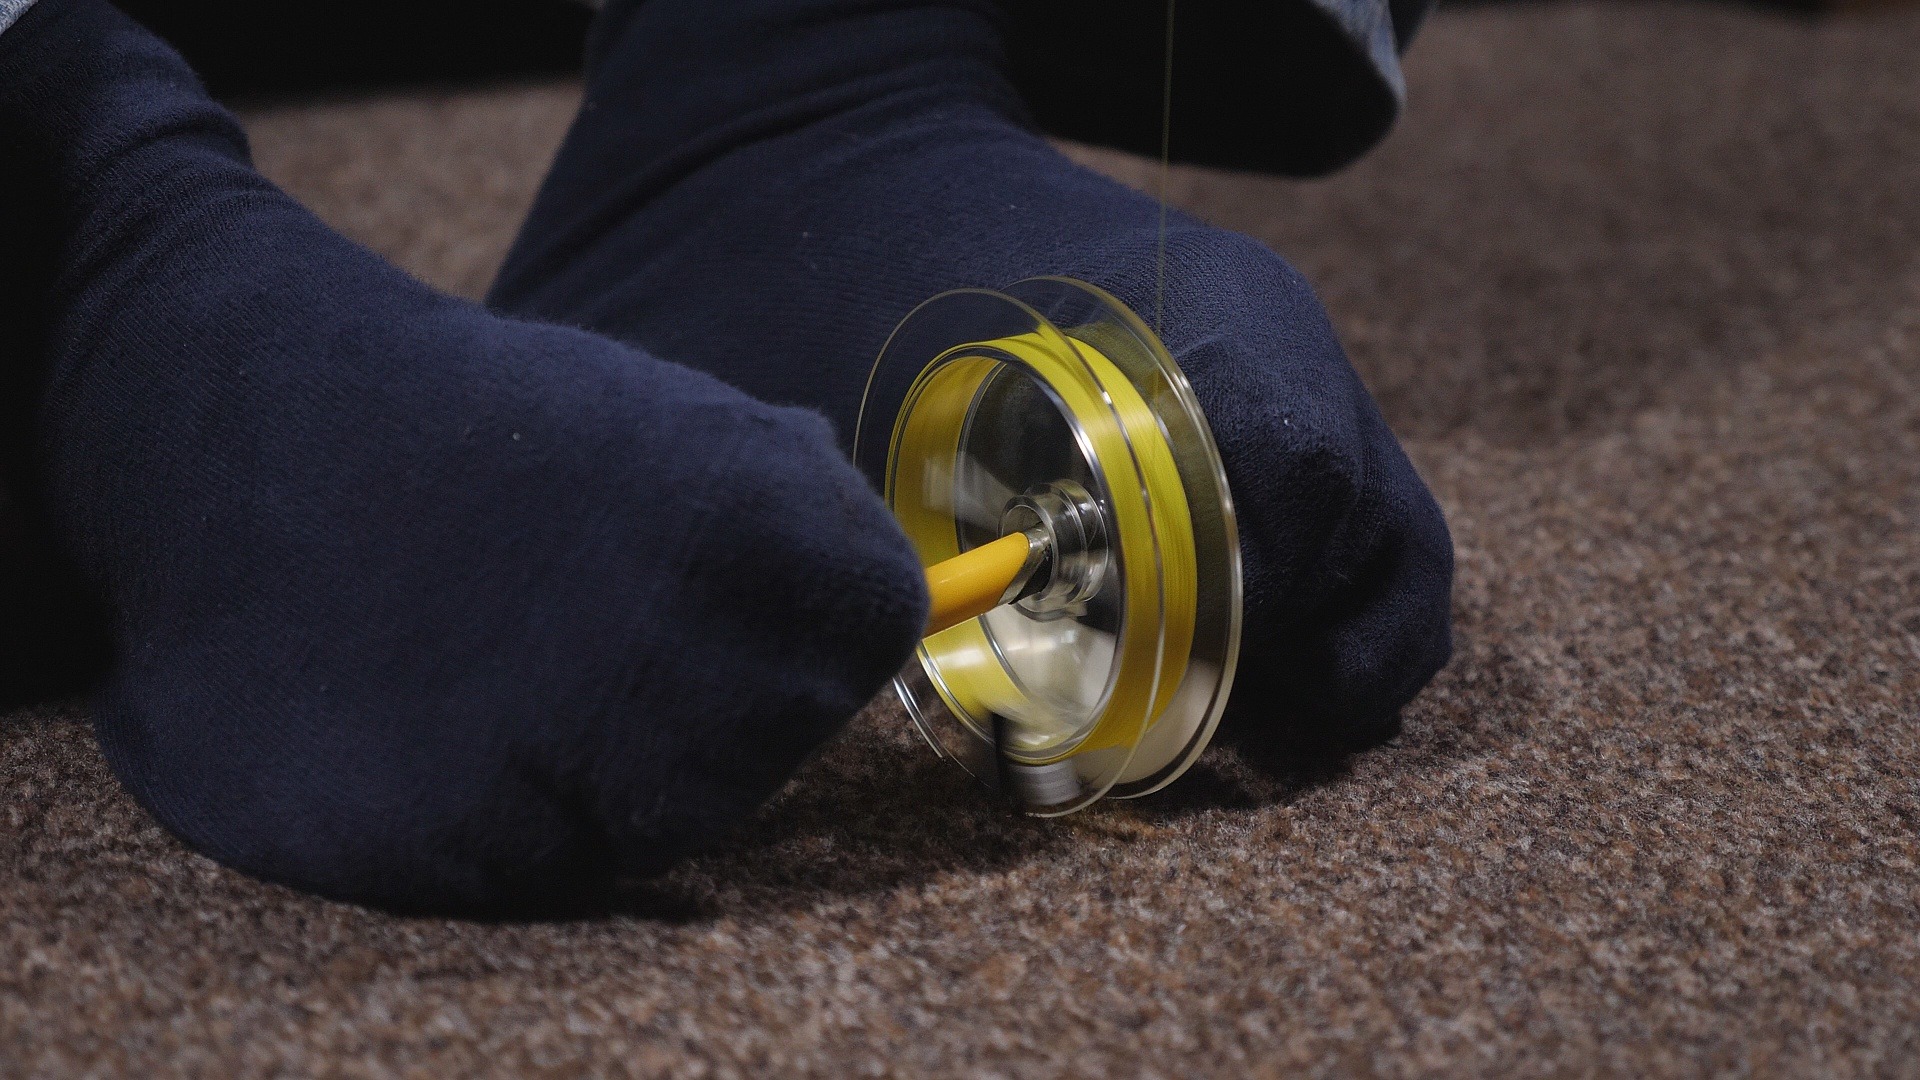
A little trick I use to avoid tangles is to grip the pen with my toes so I can add a VERY LIGHT pressure to the edge of the line spool and stop it from over-running. It’s a bad idea to just allow the line to peel off without allowing the spool to rotate. When this happens, each loop of line that comes off the spool puts a twist into your line and you’ll soon end up with a “monkey’s fist” of a knot. In many cases it’s the kind of knot that ends in scissors and strong language!
Of course, if you have a fishing buddy, they can help you by holding the pen and just putting a little pressure on the line spool.
Just be sure not to put too much pressure on if you’re adding line to a super-light “BFS” or Bait Finesse System spool – that pressure alone can be enough to crush and warp your spool.
Beware: This problem is even more sneaky when you’re spooling up ultralight spools with non-braided line (since nylon and fluorocarbon monofilament have a bit more stretch than braided PE line)..
If you stretch your line by applying too much tension, when the line wants to shrink back towards its original length and diameter, the outer turns of line can prevent the diameter expanding. What happens then is that the expansion presses inwards and crushes the spool. Expensive and annoying.
In a rush, it’s possible to toss the spool onto the ground or even into some water and allow it to spin and jump around while you wind line onto your reel. In fact, with braid, there can be a benefit to wetting braid as you’re winding it on. That can help it lay down a little bit neater and with less slack. Just make sure you don’t lose your spool and leave litter.
The most sure-fire way, though is to add it directly from a spool that is under control. You can always soak that spool of braid in a tub of water before winding it on if you want to spool up with wetted braid. The method pictured below gives you complete control over tension and how the line beds down.
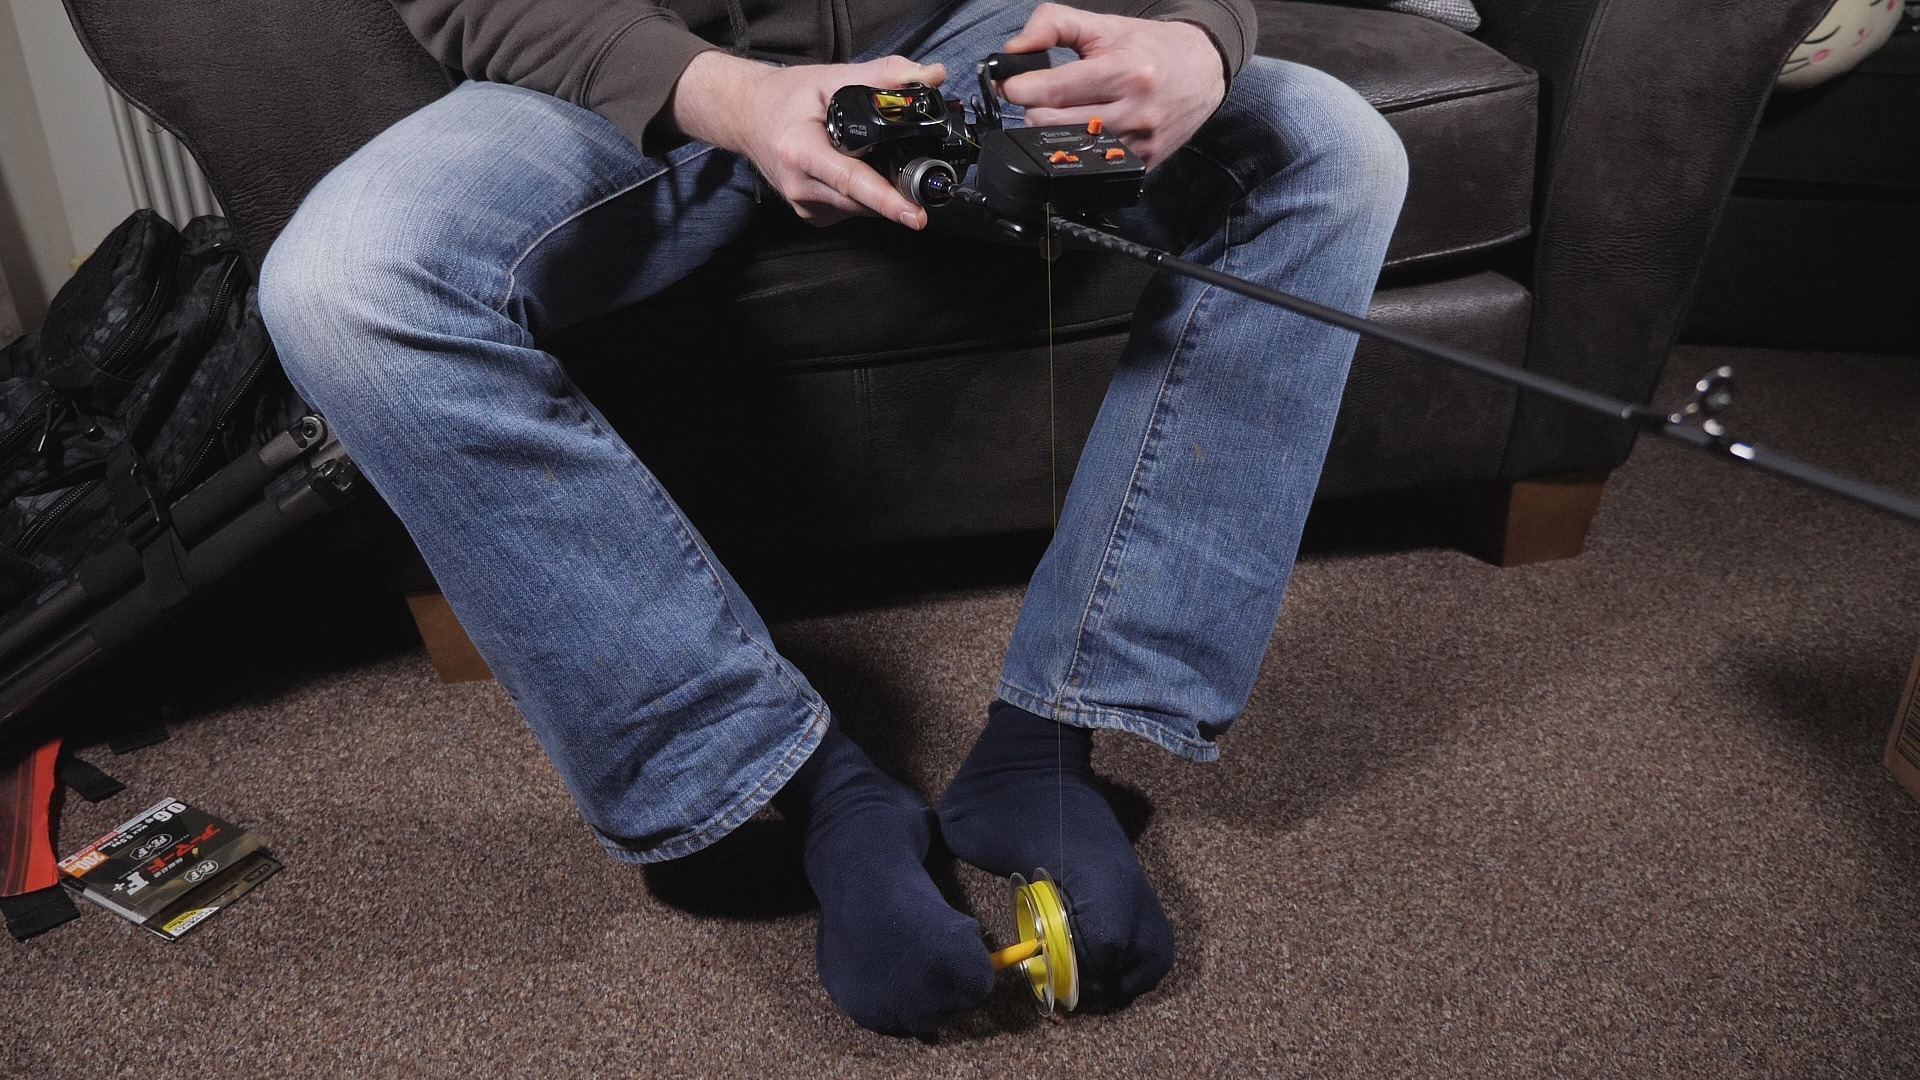
Be aware that, because the line has a little bit of side-to-side “play” within the line-guide you might need to shift the angle of the rod a little bit (and if necessary use your thumb) to get the line nice and evenly laid across the full width of the spool.
Step 3: How to Set up a Baitcaster Reel so it Doesn’t Backlash
Right, so you’ve got your line spooled onto your reel – here’s where you get to mess with the settings! Here’s where I might go against some of the more popular advice for this…
We’re going to look at two main areas in this section – Spool Tension Adjustment and Brake Adjustment.
How to Set Up a Baitcaster Reel: What Spool Tension Adjustment is For
First of all, here’s what I believe spool tension is NOT for…
It’s really common to have people talk about the lure drop-rate as a guide to setting spool tension. This is where you are told to hold the rod out roughly horizontally with your lure tied to the end of your line. Then you press down the thumb-bar to release the spool. Allowing the lure to drop towards the ground, the idea is said to be so that the lure drops at a nice medium, controlled pace.
While there’s nothing particularly wrong with checking lure drop rate – I think it is a very misleading approach to setting spool tension.
In reality, you shouldn’t be using your spool tension to brake your spool…
That’s what your brakes are for.
Instead, I feel the purpose of spool tension adjustment is to avoid it being so loose that it “chatters” during casting (and doesn't spin smoothly). At the same time it must not be so tight that it actually rubs and slows the spool to shorten your cast.
In other words, the ideal spool tension allows your smoothest, longest and most-accurate cast.
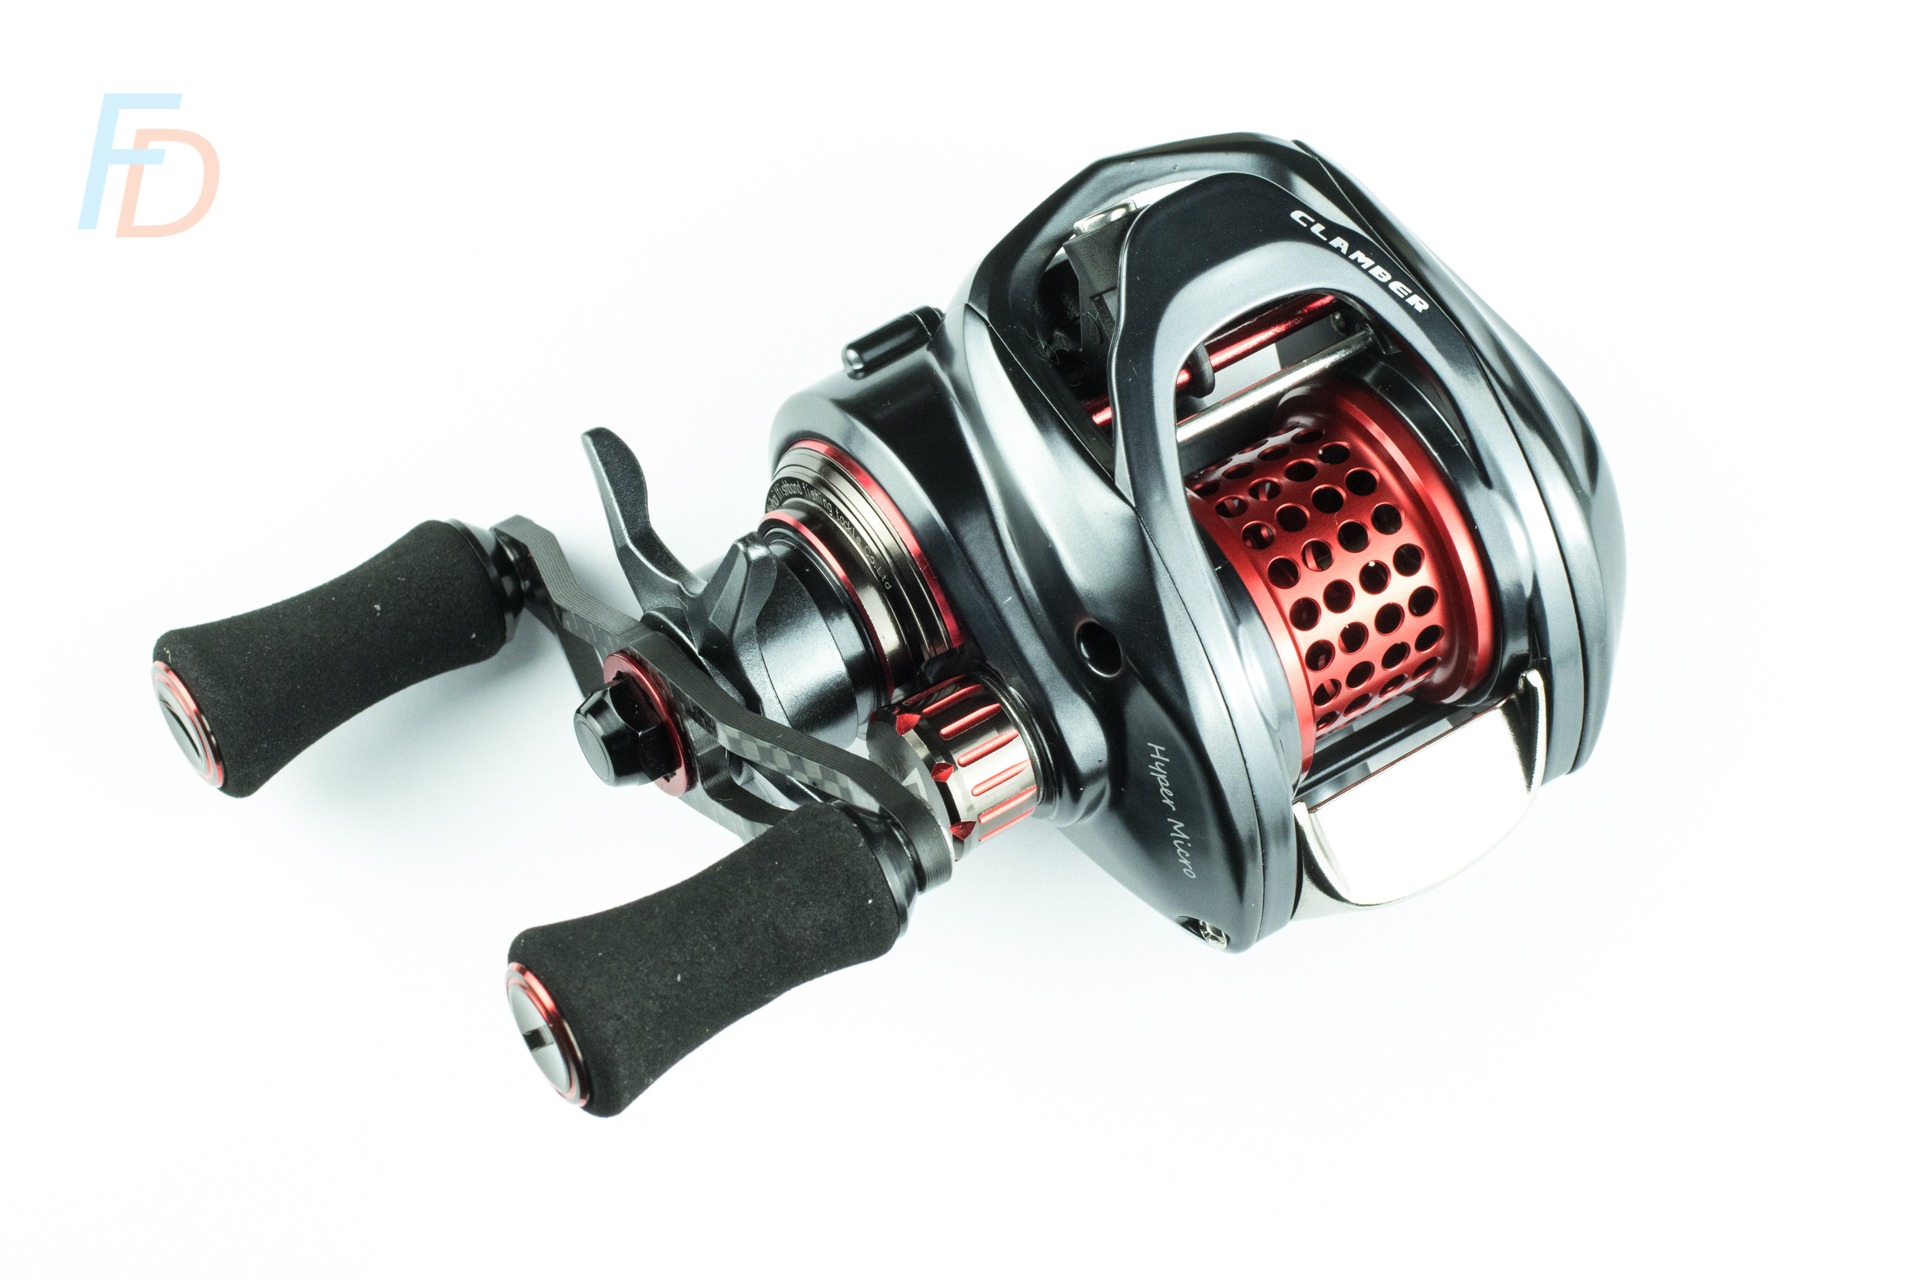
The Spool Tension Adjustment Dial is normally on the same side of the reel as the crank (in this example it is the small dial just to the left of the words "Hyper Micro" on the side plate of the reel). This dial has a grooved "tread" around its perimeter to aid grip when adjusting the settings
For me, the quickest and most repeatable way of doing this is:
Coincidentally, that setting will probably give you something like a smooth, controlled lure-drop – yet a "smooth lure drop is hard to define as a precise, repeatable goal. Contrast that to the instructions for side-to-side play minimisation and then backing off the smallest fraction.
Brake Adjustment to Minimise Back Lashes
Poor casting can always earn you a back lash – so don’t be fooled into thinking there’s a magic setting to eliminate them. With that said, learning how to set up a baitcaster reel so that the chances of a back lash are minimised is a huge advantage.

Newsflash – it doesn’t matter what braking system your reel has; the steps are basically the same. So whether you have:
The process is to crank the brakes up to max…and then cast. See how well it goes out…then turn down the brakes and cast again. Keep doing this until you get the first hint of your spool fluffing up on a cast. Then, turn the brakes back up by the smallest step allowed by your adjustment system.
You will probably find that, for different rods, lure weights and casting applications (e.g. skipping versus overhead casts!) there will be a different optimum setting. I’d urge you to lean towards using mainly brake adjustments (instead of spool tension) to control over-runs! It's kind of the same as using your drag to control paying out line to a running fish (you should't use your spool tension for that either).
Please let me know in the comments if you found this useful - and also do let me know about exceptions you've found to the basic rules above. For instance, I'm particularly keen to hear from you folks who have a different approach to spool tension setup!
Paul

Not quite the same but do your version for sea fishing. Just stop the side to side and use the brakes. Then again, trying to control the drop of a 6oz weight with tension would end up with the spool so tight, you’d manage a 20 yard cast.
Nice!
Paul
Spot on. Thanks.
A few years I purchased an ABU Black Max reel where I spooled some braid on spool . I tested the knot where it broke very easily . The culprit was the rough edges to the porting holes . My solution was covering the holes with a layer of cello tape prior to winding the braid on . Problem could be found on other spools .
Nice! Thanks for the tip Robert.
Paul
[…] How to Set up a Baitcaster Reel: Clear & Easy 3-Part Guide […]
I do it as you have stated, for Normal use. But there are times when a tad of spool tension does help. When casting into wind for example.
If you read on any ABU site, they do advocate the use of the tension knob, to control the fall of the lure and to stop backlashes. So I guess it’s a case of do what you feel happiest with.
Good stuff Dave – I suppose another element to add into the mix is the emergence of “zero adjuster” dials on reels; which you’re supposed to leave alone… But why make them adjustable…? Quite strange – although there is a certain confidence to be gained from having the reel-tuning specialists set it perfectly according to their design.
Thanks again,
Paul
[…] How to Set up a Baitcaster Reel: Clear & Easy 3-Part Guide […]
I find setting the spool tension for minimal side to side play best when flipping and pitching but if your a beginner looking to gain confidence and perfect your casting technique & casting distance it is better to use the end tension knob to adjust the speed your lure drops off the rod. With a looser spool tension there are too many variables like wind strength/direction, lighter/different profiled lures etc. With budget reels that is more of a problem as tolerances/braking systems are not so good. With the more expensive reels i have tried they are far more tolerant of any mistakes made by the angler and do not need adjusting as much with the various lures. Once you start flipping, pitching etc you will need to have that spool spinning more freely to generate the inertia needed cast the lighter lures. Each to their own i guess. We all use different styles, lures in different circumstances.
That’s what this site is all about Adrian – so thanks for putting your experiences on here too for everyone to see.
Best wishes
Paul
Should be writing for every brand out there! Companies still love write up like these for their blogs!
Well that’s very good of you to say Jimmy – now I just need to tell all fishing brands…. he he he he
Paul